ECE Scholarships User Manual
Below is a user manual containing an overview of instructions on how to complete each of the key workflows available in our application.
Actions
- Installing Application
- Logging In
- Importing Data
- Scholarship Functions
- Reviewing Students
- Viewing Recommendation Results
Installing Application
See the README.md for a more technically explanation for setting up the application. Currently running as a distributable is in an early state and unusable due to issues with streamlit and the cli. For this reason, the guide will show you how to run from within the repository.
- Step 1: Install Poetry (required for managing packages)
- Step 2: Inside the root of the project directory, run
poetry install - Step 3: Install poethepoet
pip install poethepoet - Step 4: Run
poe run
After running this command, a flet application should appear. Make sure to add your sharepoint URL, and then press start server. You should then be taken to a new browser tab with the streamlit application running.
Logging In
- Prerequisites: HawkID, Read/Write Permissions to SharePoint Site, Application Started
- Step 1: Click on the
Accounttab on the right-hand side - Step 2: In the first box titled
HawkIDenterHawkID@uiowa.edu, the username you use for Office 365 or Employee Self-Service - Step 3: In the second box titled
HawkID Passwordenter your HawkID Password, the same password you use for Office 365 or Employee Self-Service - Step 4: Click on the button titled
Log in to SharePoint Site - NOTE: This must be the first step done after installing and starting the application
Importing Data
- Prerequisites: Logging In
- Step 1: Select files to upload from the file chooser
- Step 2: Select an alignment column. A good alignment column has the following:
- No two rows have the same value
- The values in the row are a unique identifier for the row, and common between the two datasets
An example of a good alignment column would be the UID column which contains the unique university ID of each student. Alignment columns are used for aligning the rows of the two datasets and combining the data.
-
Step 4: Enter an alignment column name, this will be the name of the combined alignment columns in the final dataset.
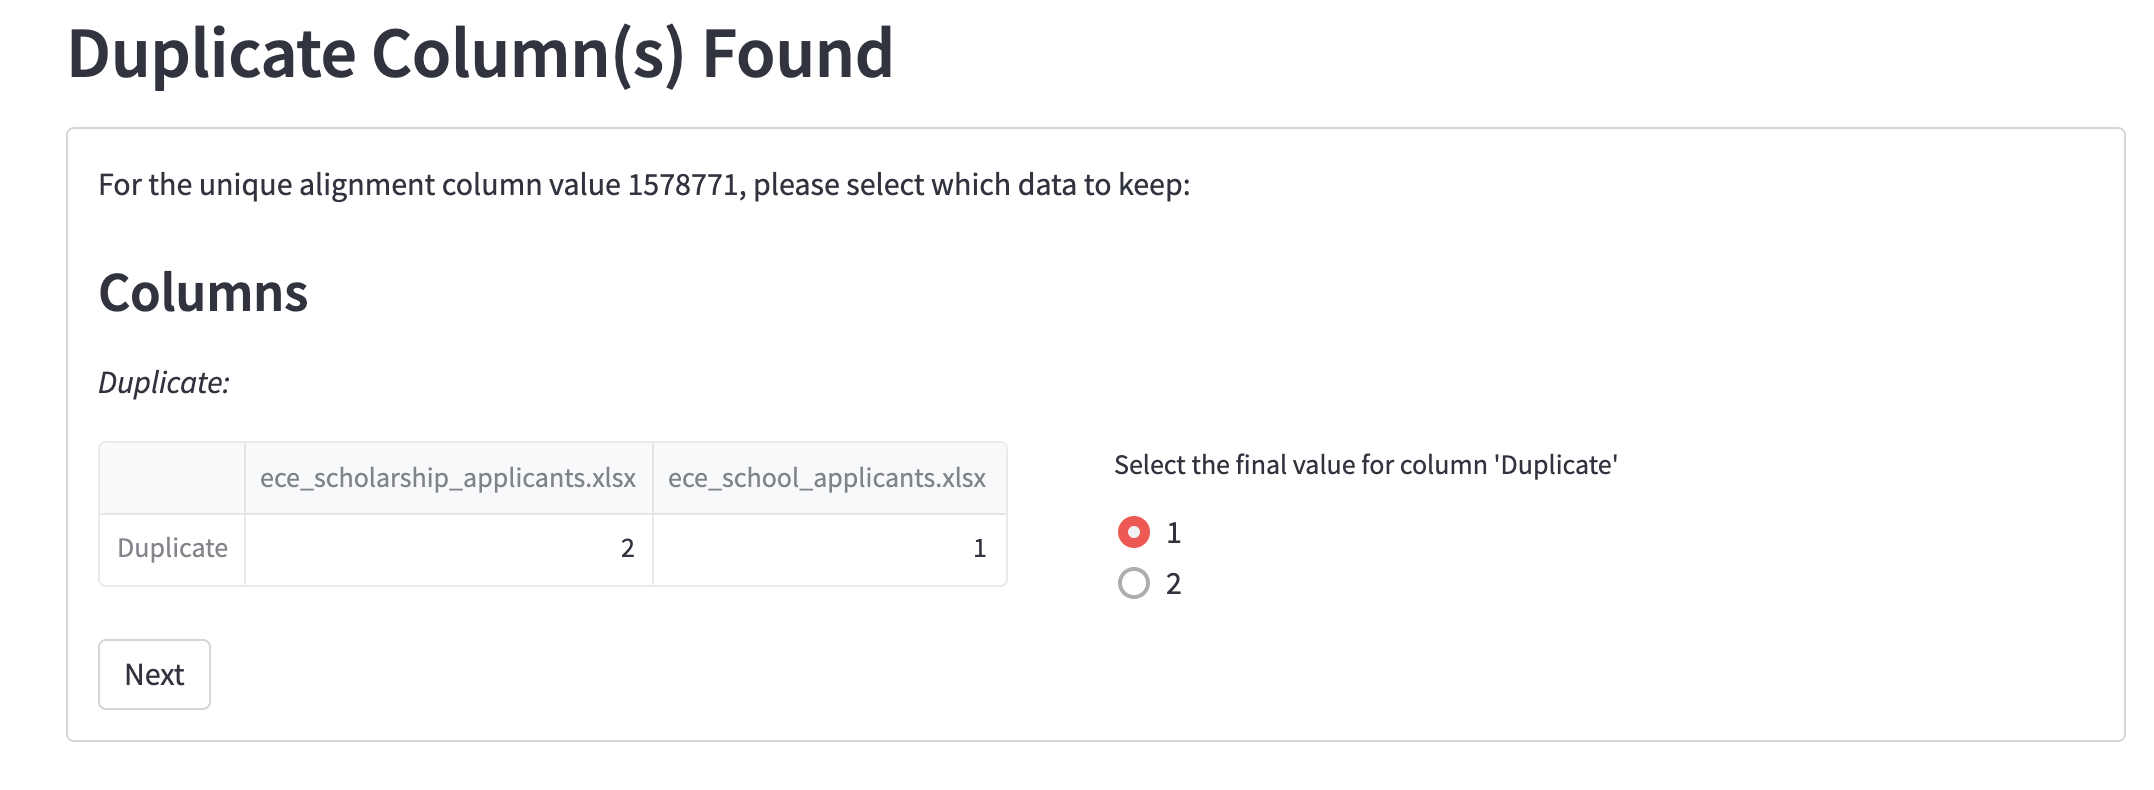
-
Step 5: If duplicate data has been detected, a popup will appear notifying you of this. There can't be duplicate data in your merged set so you must manually select which of the duplicate values is the correct one to use in your final sheet
-
Step 6: The application may find columns it things are similar, if so you can skip or merge. The application will show a preview of what the merged data will look like in the FINAL COLUMN.
You can change the columns you want to merge by selecting from below and pressing update:

You can also write a custom python script by expanding the custom script area:
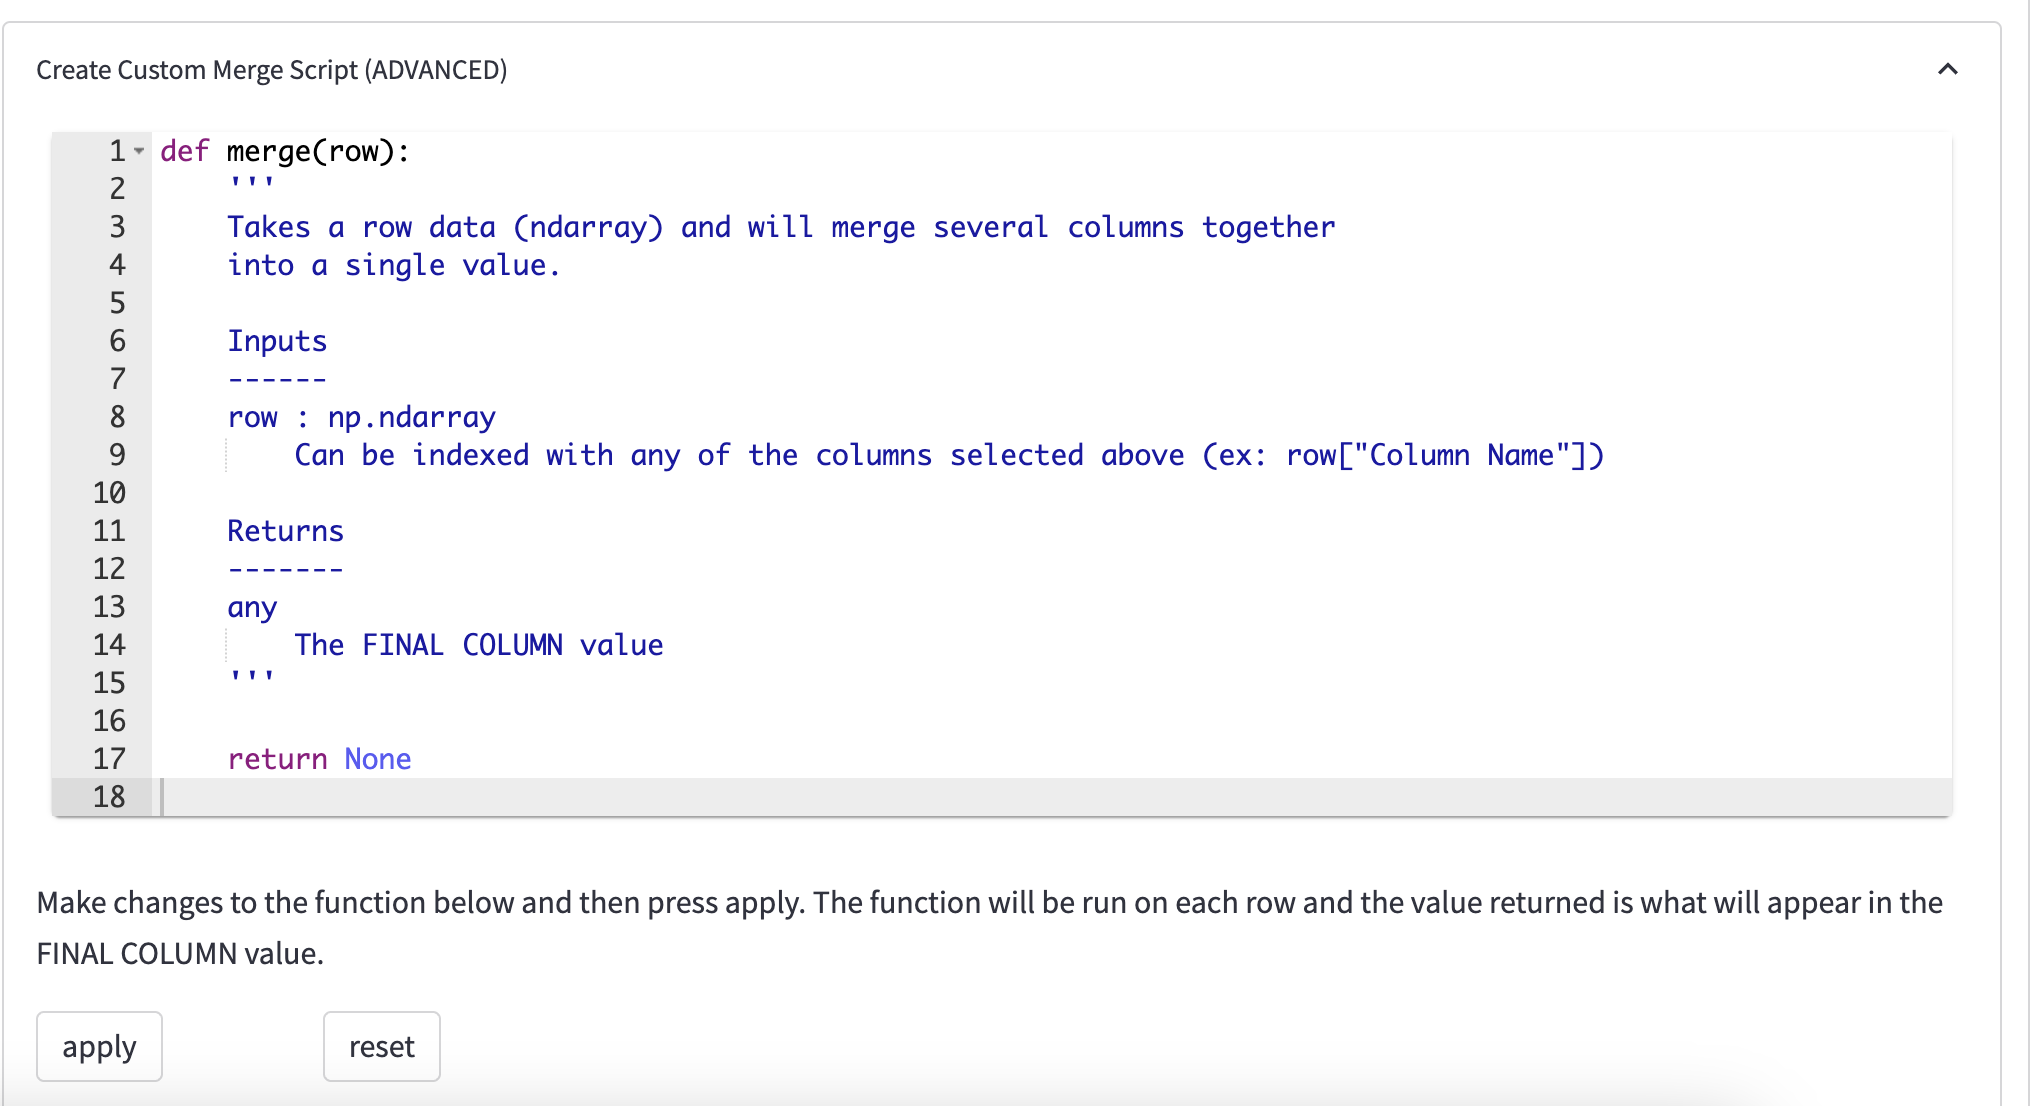
Press apply to have the script run on the columns you selected above. The FINAL COLUMN will reflect the return statement of your script and be what the new column is merged to.
When selecting merge at the bottom, you are telling the script to take the columns to the left of FINAL COLUMN, remove them, and add FINAL COLUMN instead. If you skip, the script will make no changes
- Step 7: Press
Set as Masterto save your imported data to the master sheet in sharepoint.
Scholarship Functions
-
Prerequisites: Importing Data
-
Navigate to the "Scholarship Management" Page
Creating a new scholarship:
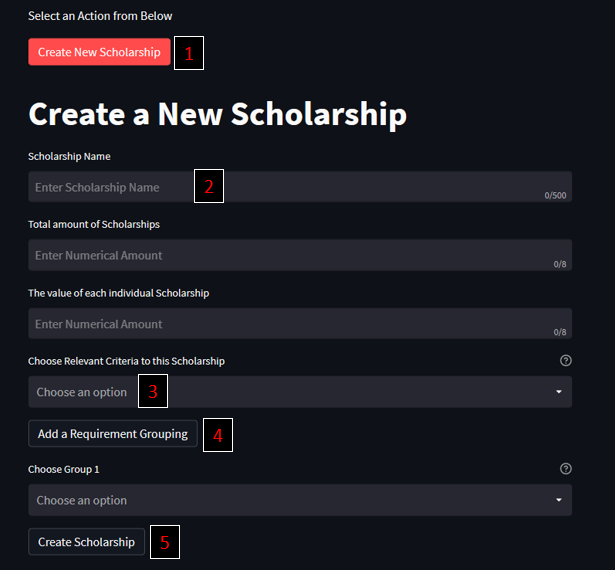
- Step 1: Press the "Create New Scholarship" button
- Step 2: Fill in the "Name", "Total Amount", and "Value" fields
- Step 3: In the selection box, press each of the criteria that you would like to add as a requirement (this is based off of the imported data's columns) for this scholarship and then fill in the minimum requirement, i.e. GPA of 2.0 will filter for all students with GPA 2.0 or greater
- Step 4: If there are criteria that should be grouped together, i.e. ACT Math and SAT Math as students will generally only need one, you can press the "Add Requirement Grouping" and then press both "ACT Math" and "SAT Math" to make a group of those two criteria, where only one is necessary for a student
- Step 5: Once you are satisfied with your criteria, press the "Create Scholarship" button
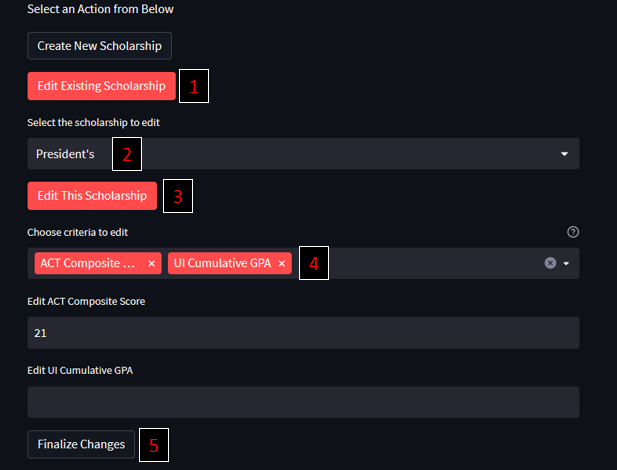
Editing an existing scholarship:
- Step 1: Press the "Edit Existing Scholarship" button
- Step 2: Select the scholarship you would like to edit
- Step 3: Press the "Edit This Scholarship" button
- Step 4: Select all of the criteria for that scholarship you would like to edit, and put the new values in the requirement boxes. Note that if the scholarship you are editing has a value for that criteria, it will be preloaded in the field. If it does not, it will be empty.
- Step 5: Once you have edited your criteria, press the "Finalize Changes" button
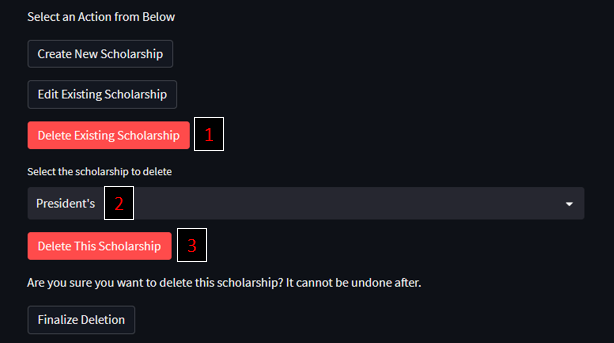
Deleting an existing scholarship:
- Step 1: Press the "Delete Existing Scholarship" button
- Step 2: Select the scholarship you would like to delete
- Step 3: Press the "Delete This Scholarship" button and then the "Finalize Deletion" button to delete it.
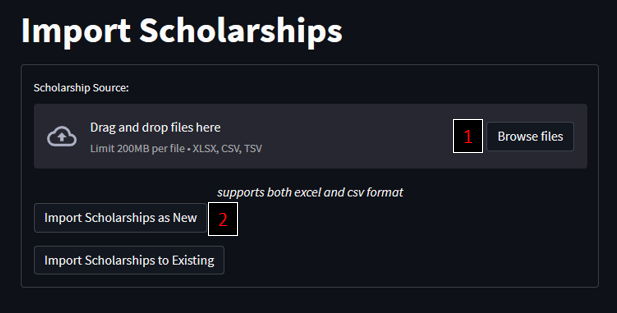
Importing an Excel spreadsheet as your scholarships:
- Step 1: Press the "Browse files" button under the "Import Scholarships" section and select the Excel spreadsheet to import
- Step 2: Press the "Import Scholarships as New" button to overwrite the current scholarships file with the selected file. Beware, this cannot be undone. They do not need to have all of the same columns as the imported data, however, it is recommended that you do not have extra different columns, as they will become dead columns and useless.
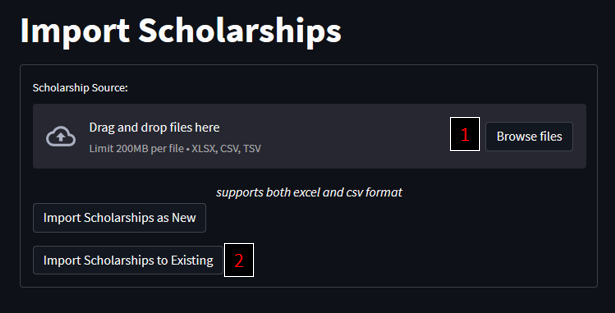
Importing an Excel spreadsheet to add to your scholarships:
- Step 1: Press the "Browse files" button under the "Import Scholarships" section and select the Excel spreadsheet to import
- Step 2: Press the "Import Scholarships to Existing" button to add the scholarships of this Excel spreadsheet to the current scholarships. They do not need to have all of the same columns as the imported data columns, as any missing columns are added to your new scholarships by the application.
Reviewing Students
-
Prerequisites:
- Logged In
- Scholarship Created
-
Step 1: Navigate to the home page as seen below
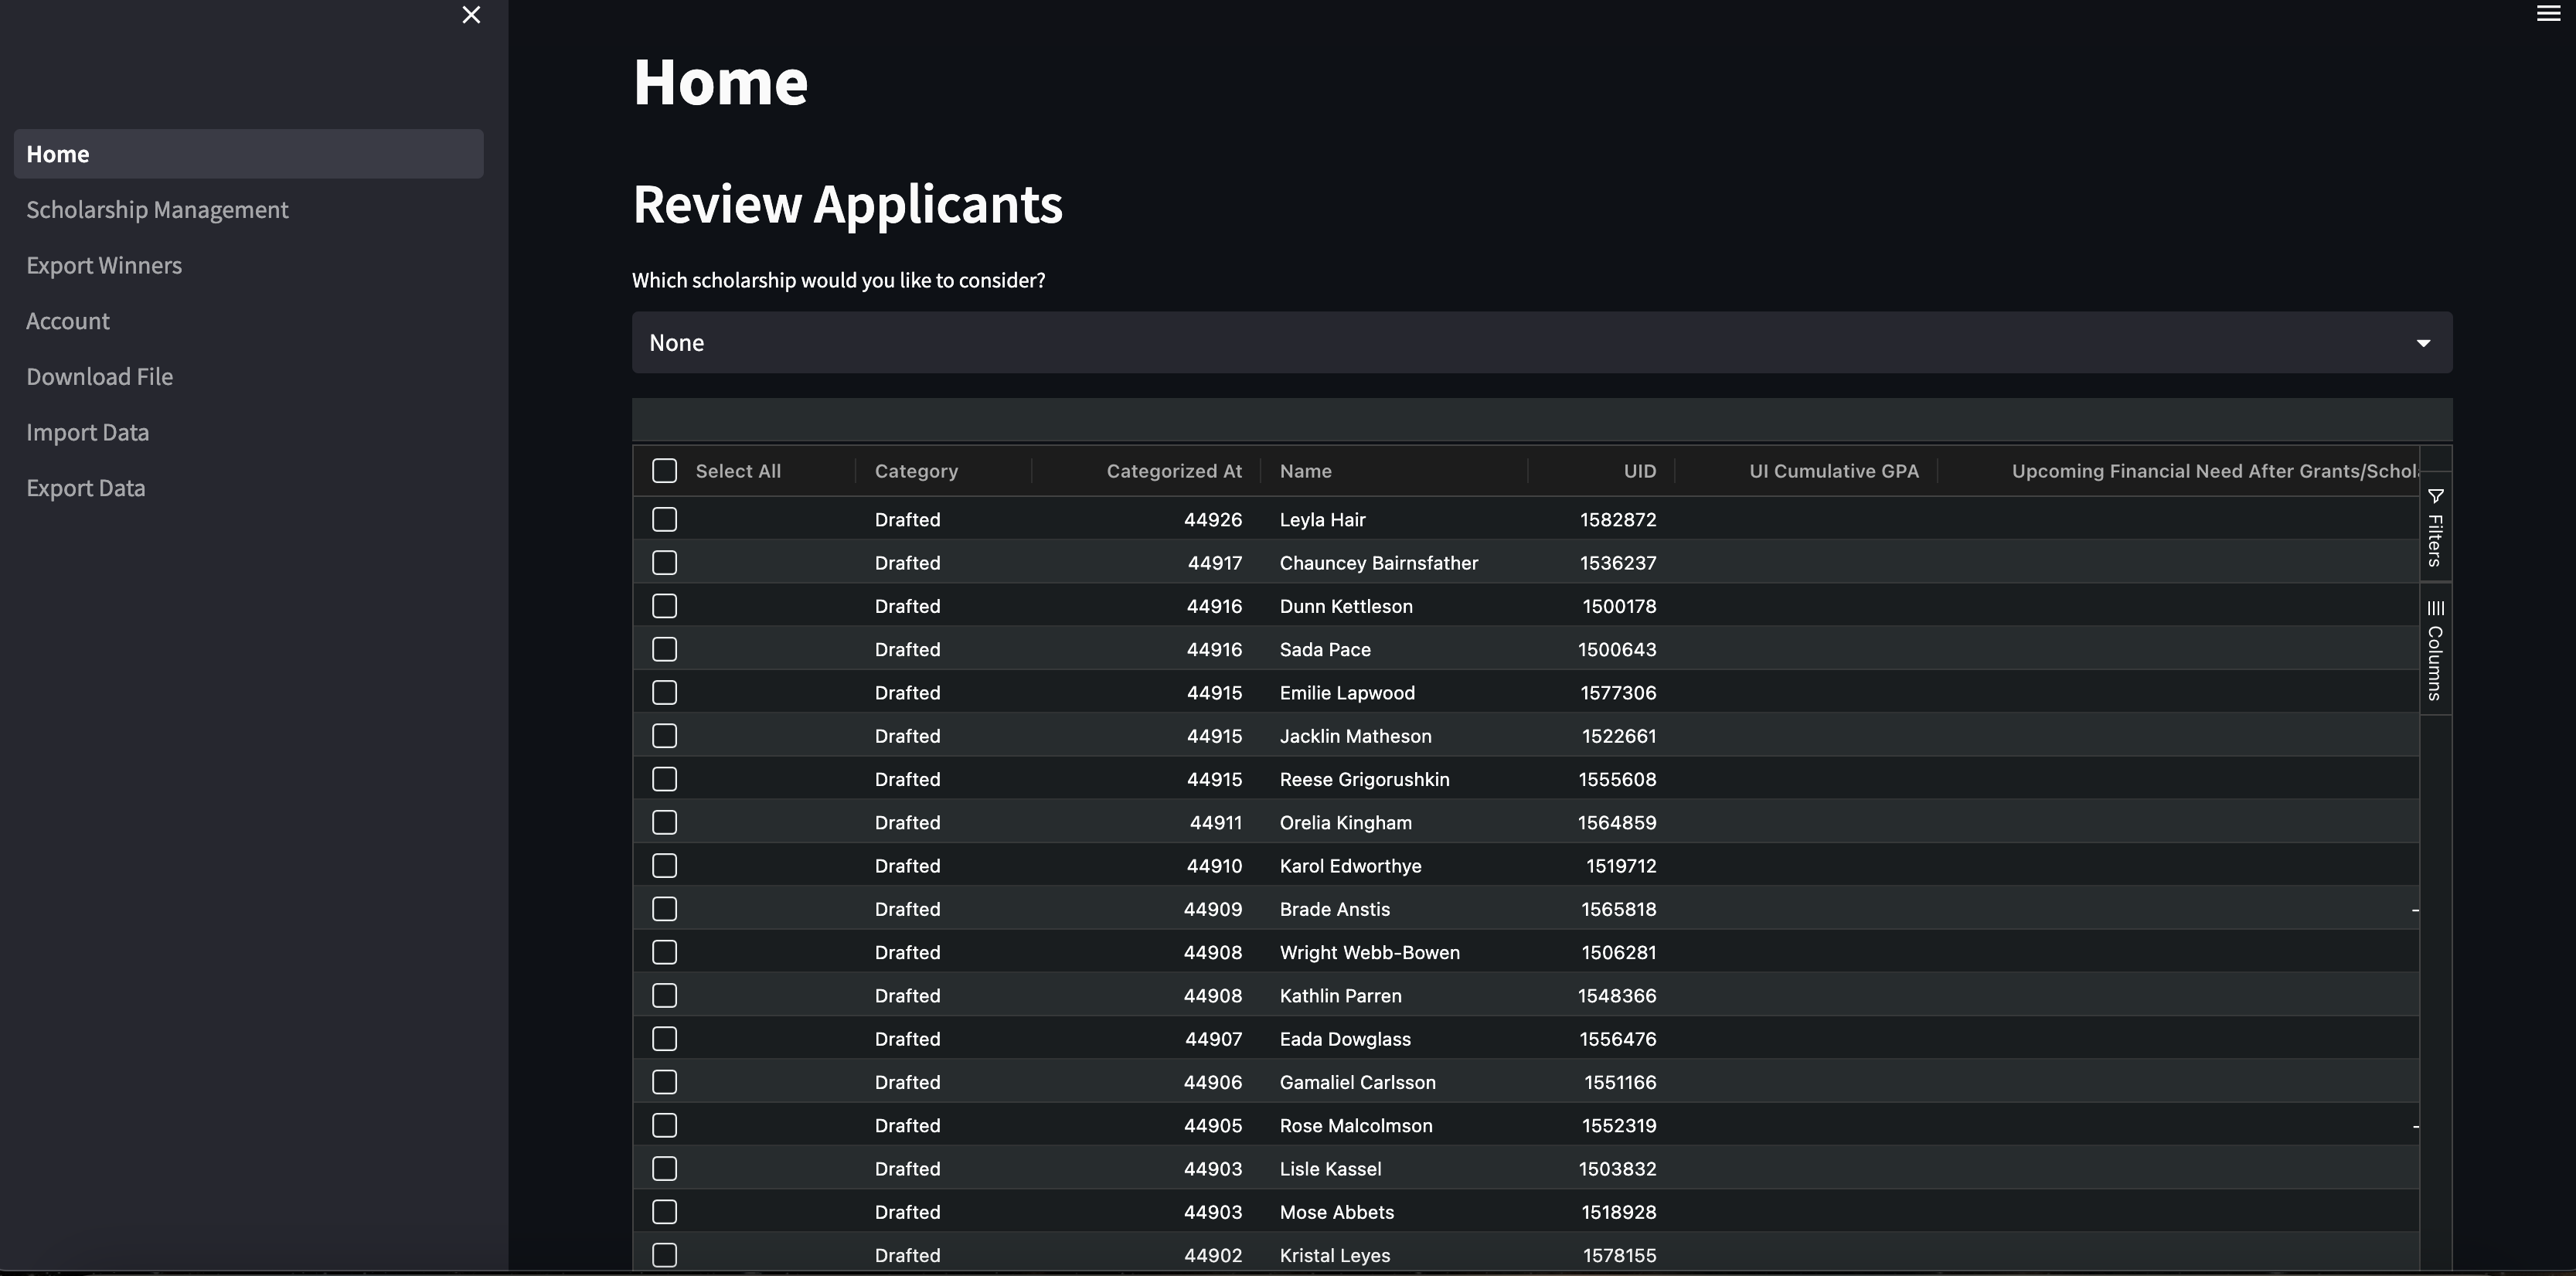
-
Step 2: Choose a scholarship to review students for under "Which scholarship would you like to consider?"
- Choosing a scholarship also filters out students that don't meet the minimum criteria. Statistics on how many students did and didn't meet the criteria can be seen below the table. If you want to do additional filtering or sorting, or change the data points you are viewing, you can click on the column headers or use the options to the right of the table
-
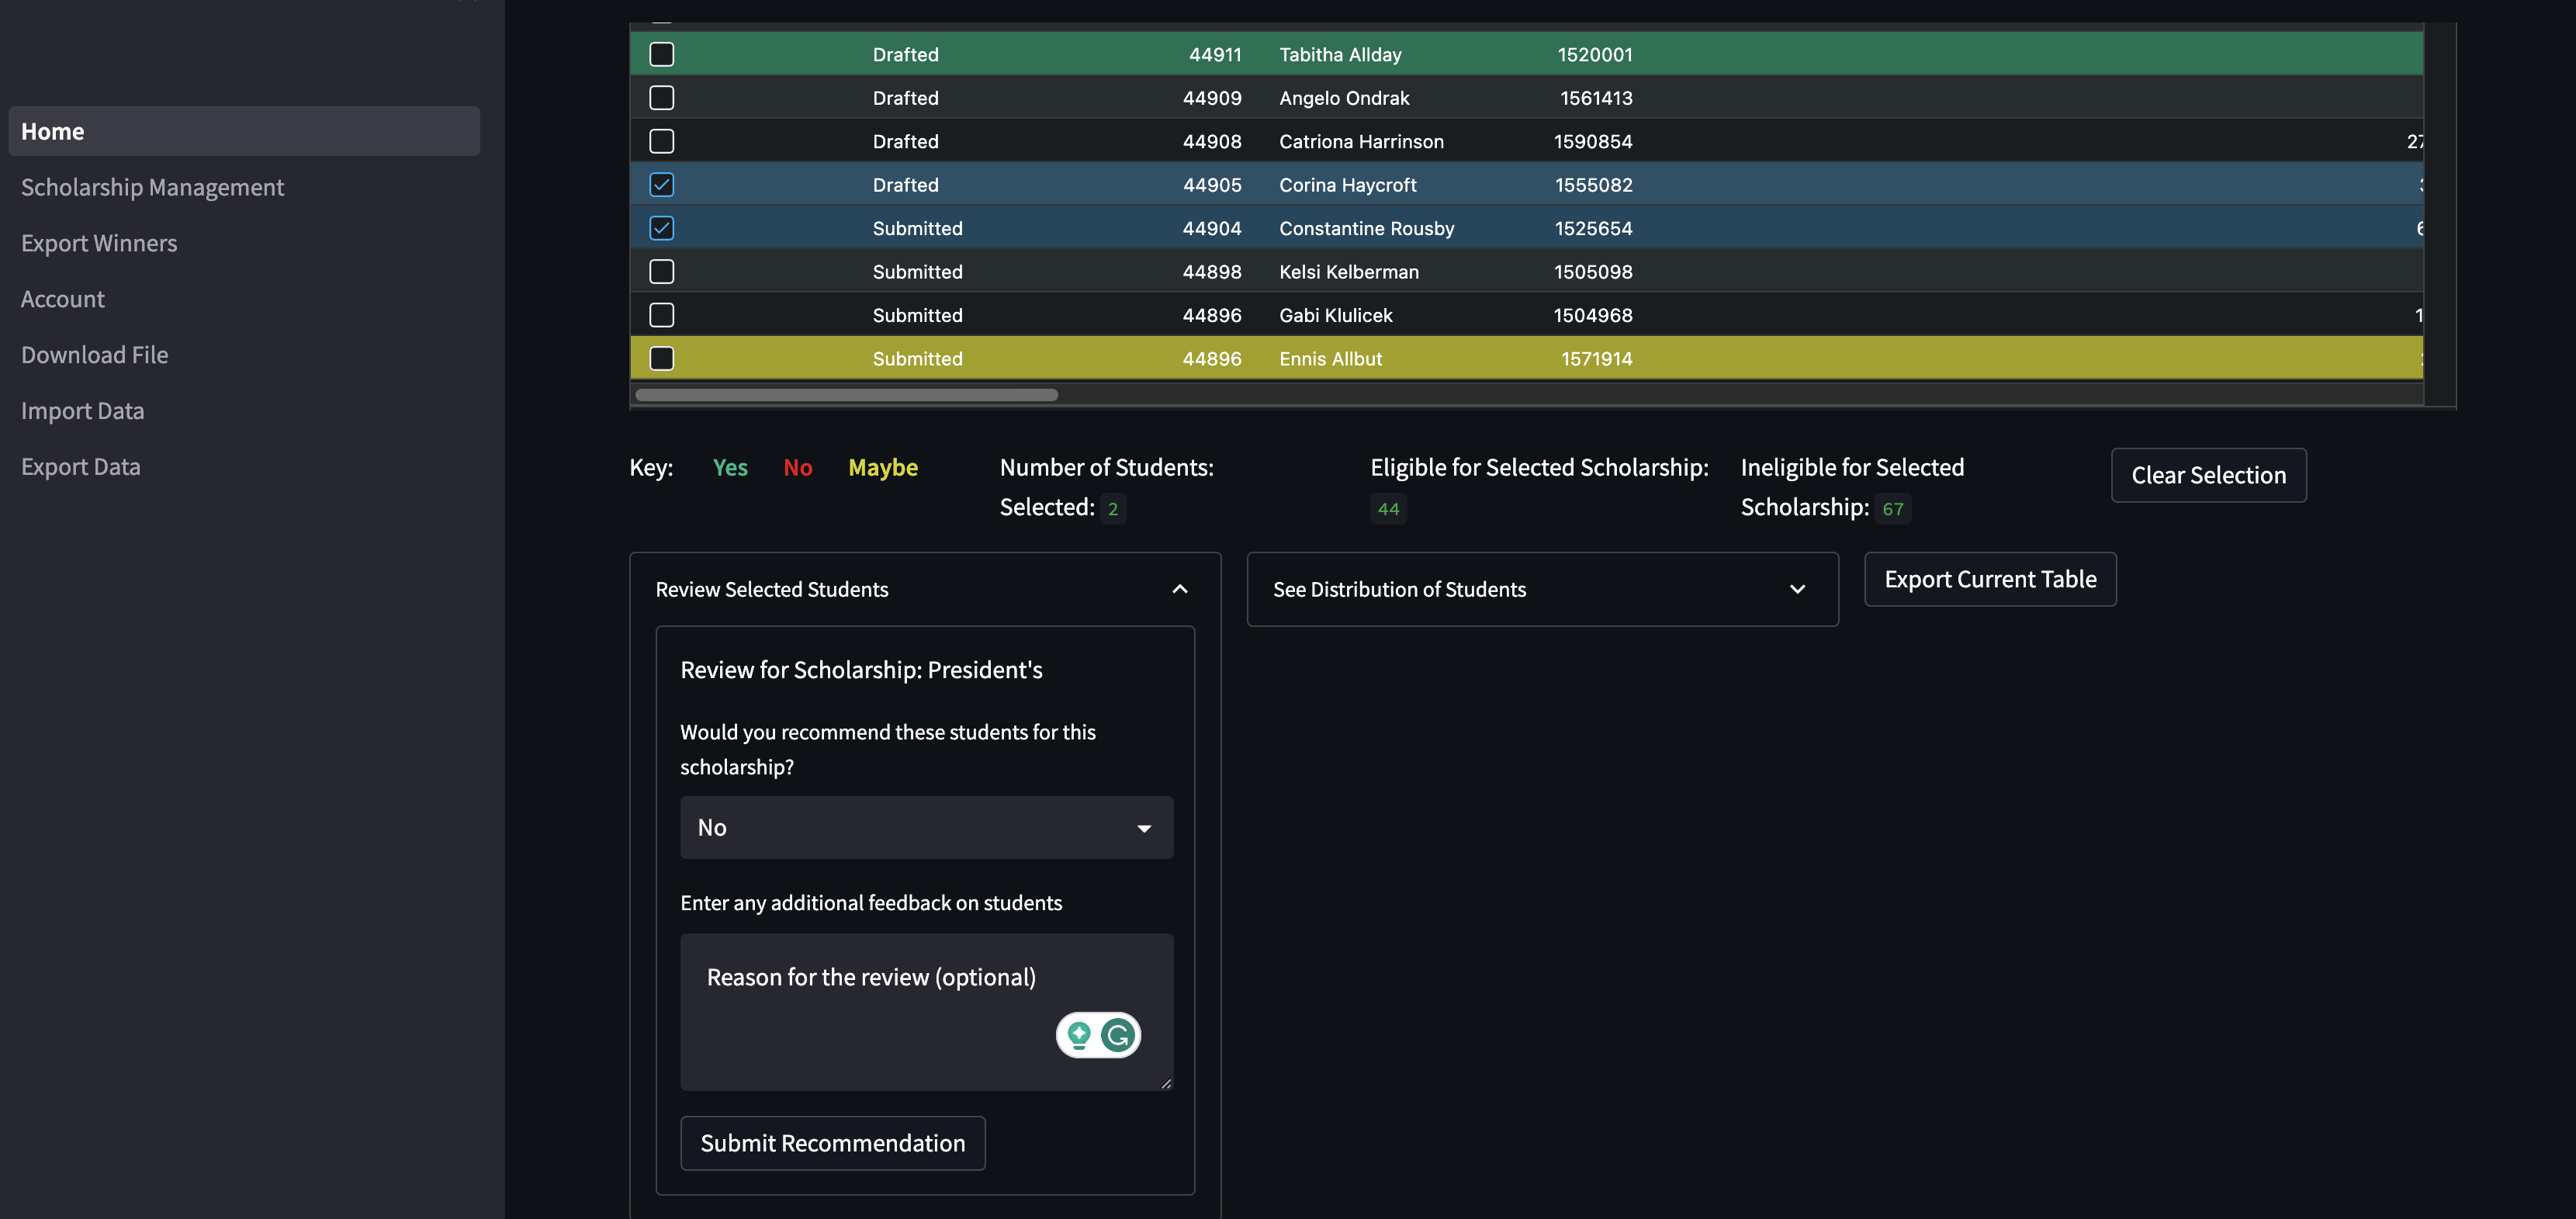
Step 3: Select specific students using the left-most column of the table provided
- You can additionally use the select all and clear all buttons, or control-click, to select and deselect more than one student at a time
-
Step 4: Click on the "Review Selected Students" dropdown below the table to access the review form. Fill out the form with the desired content and click "Submit Recommendation"
- The additional feedback field is optional. Students can only be reviewed once, and there is protection from accidentally reviewing a student twice
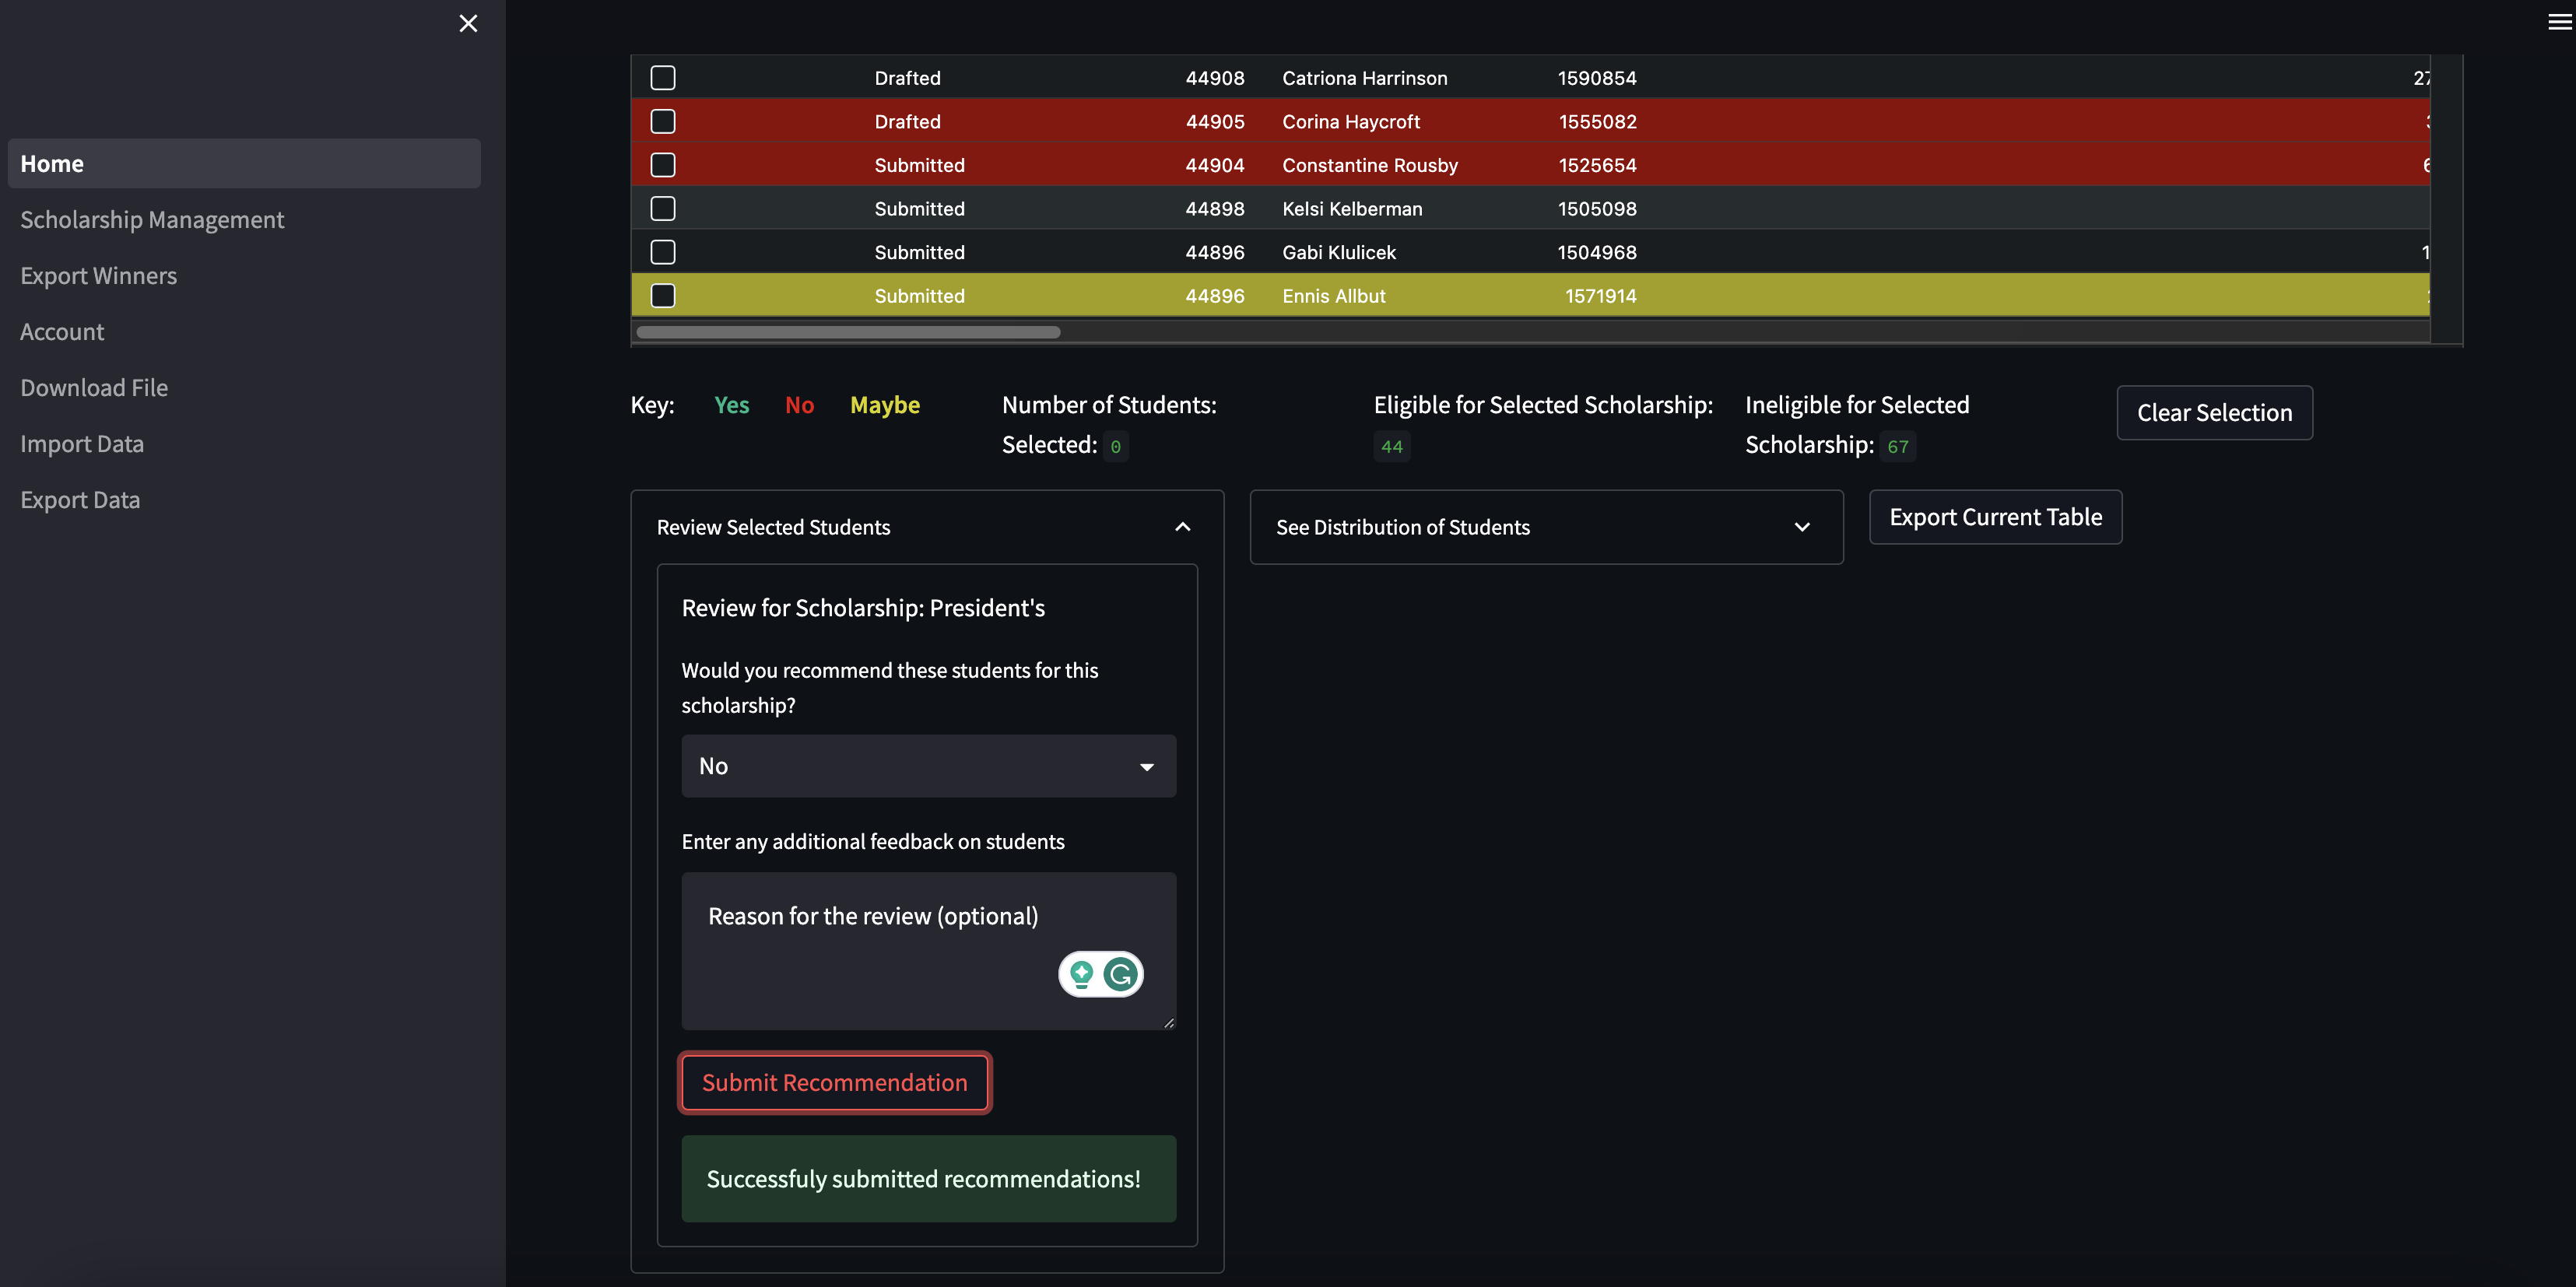
- Step 5: The page will then load a success or error message on whether your review was successfully submitted, and the color of the row will change to reflect the review you gave that student for that scholarship.
Viewing recommendation results
- Prerequisites:
- Logged In
- Scholarship Created
- Completed reviews of students for the given scholarship
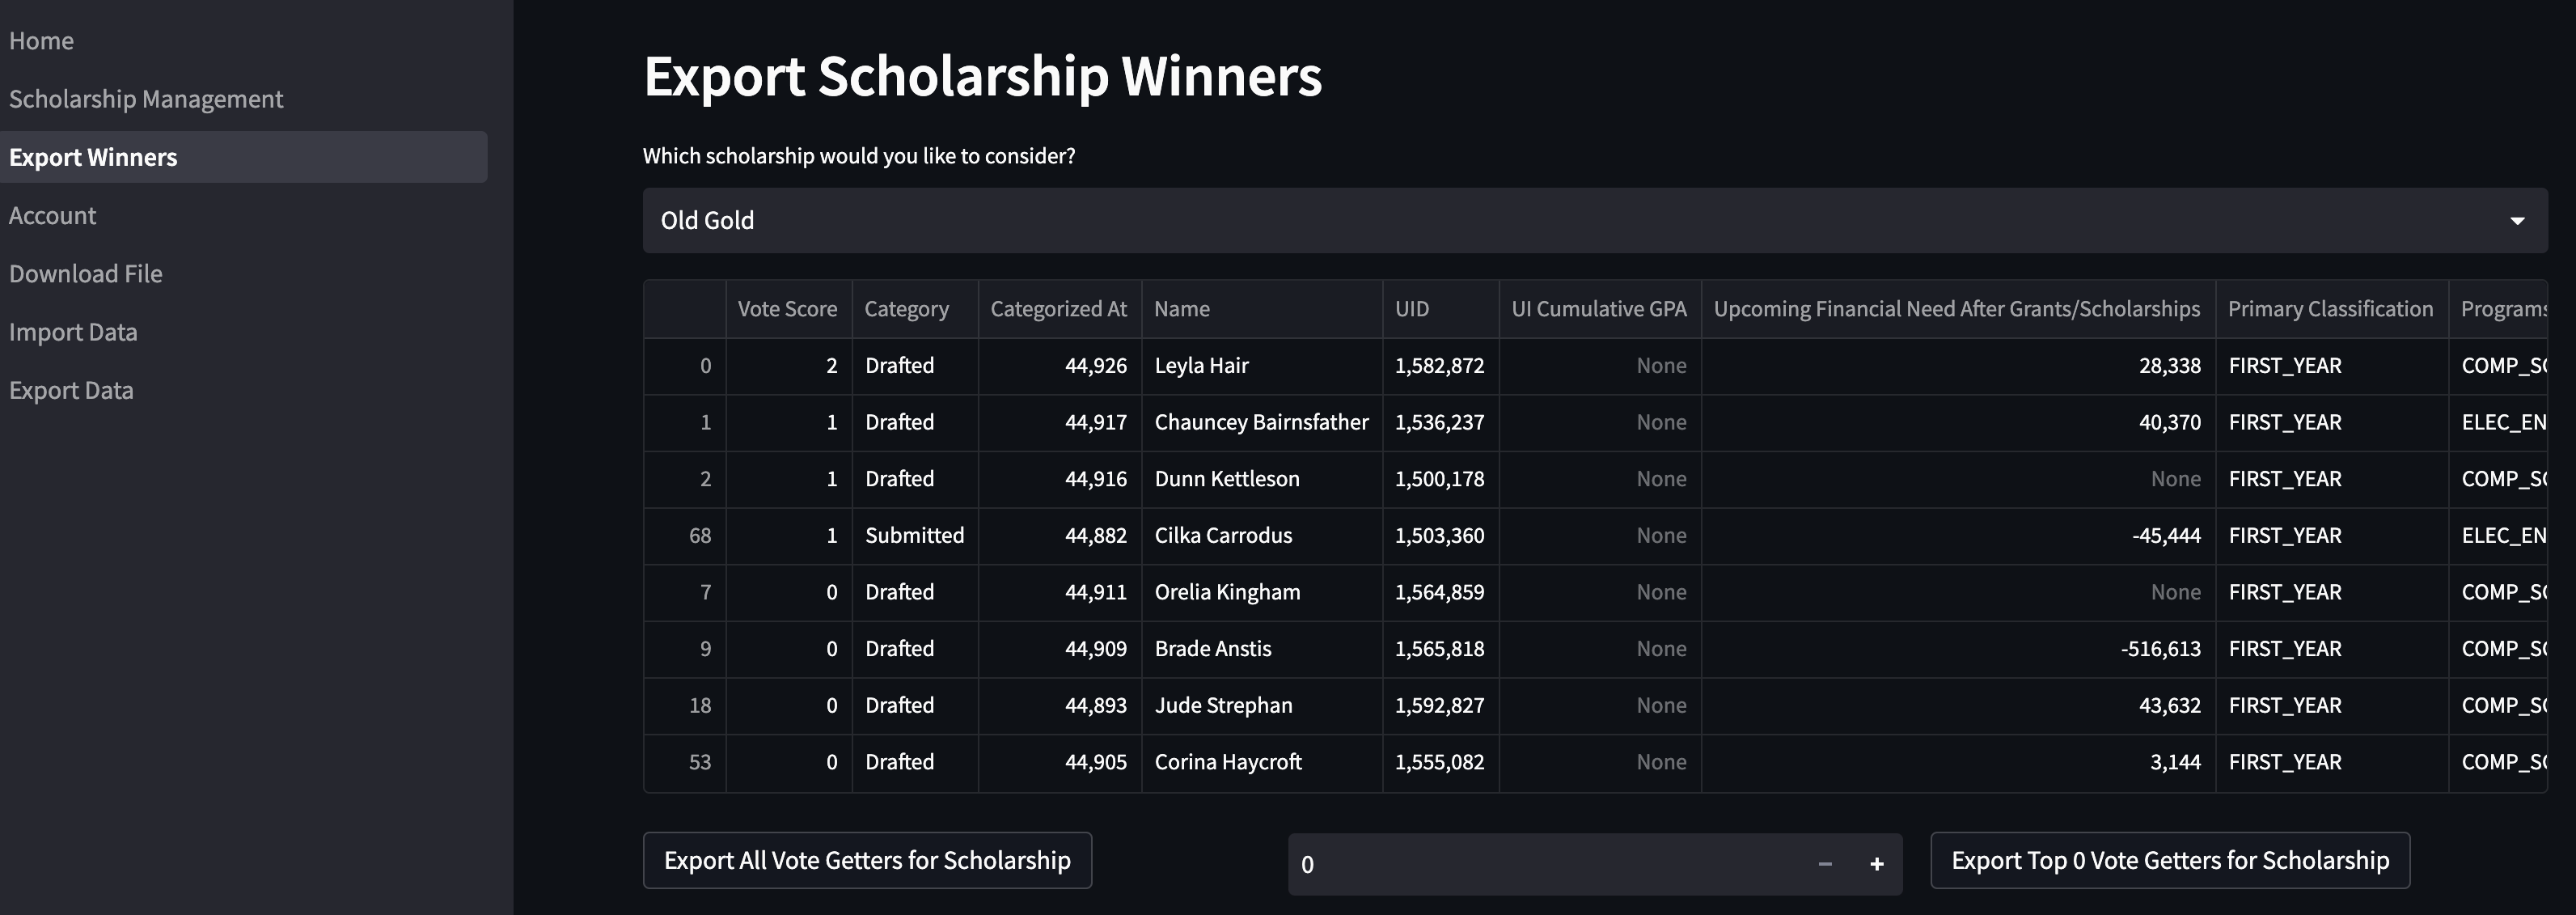
- Step 1: Navigate to the export winners page as seen below
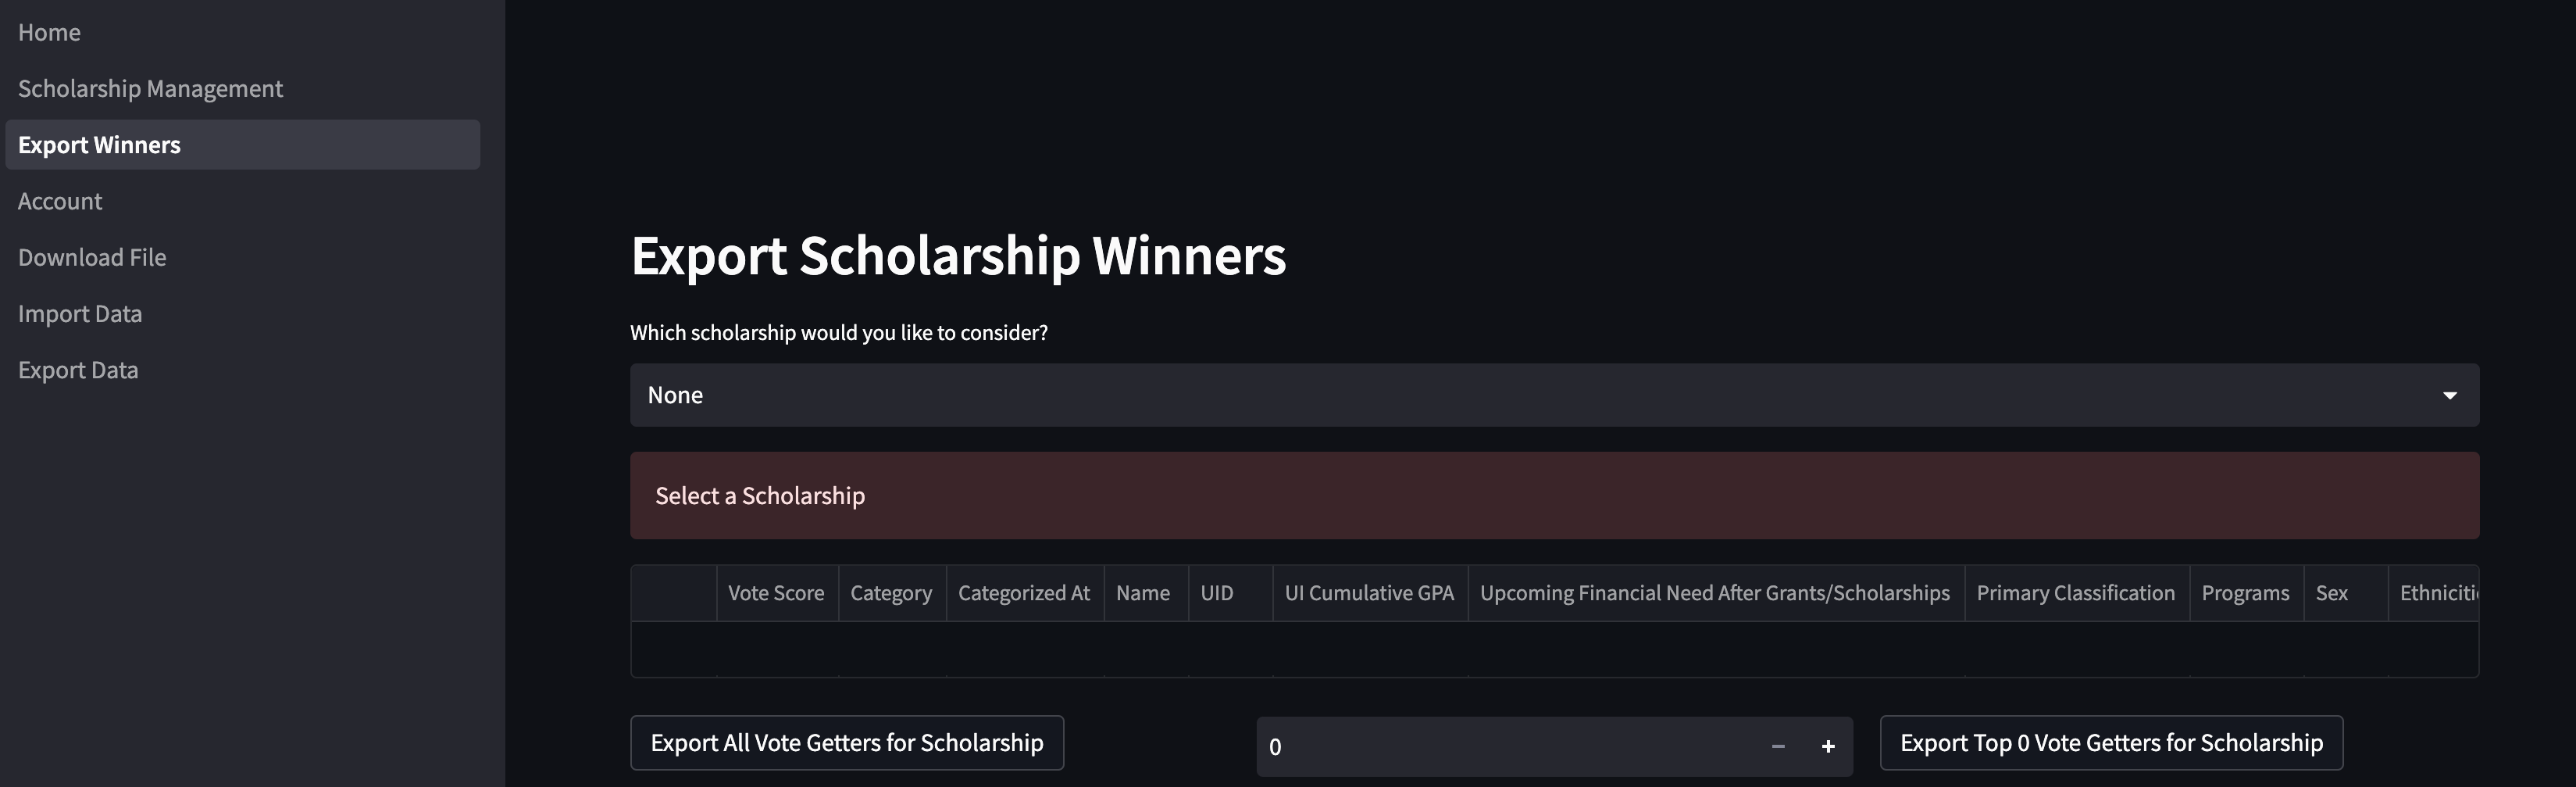
- Step 2: Choose a scholarship to view results for using "Which scholarship would you like to consider?"
- Step 3: View or export the results. For scholarships that require X number of winners, the user can choose to export the top X vote scores.
- The vote score is calculated by adding Yes (+1), Maybe (+0), and No (-1) reviews from all reviewers in the system. Students that received no reviews or vote scores less than 0 are not included in the results